How to Clean AR-15
How to Clean AR-15
Introduction
AR-15 is a versatile firearm that has become deeply ingrained in the personal development, firearms lifestyle, veteran mindset, tactical gear, and self-improvement communities. Cleaning your AR-15 is a critical part of maintaining its performance and reliability. This guide will walk you through the step-by-step process of cleaning your AR-15, ensuring that you can maintain your firearm in top condition and extend its service life.
Regular cleaning is not only essential for maintaining the weapon's functionality but also for ensuring the safety of those around you. Proper cleaning can prevent corrosion and jamming, thus reducing the risk of accidents. Let's dive into the steps.
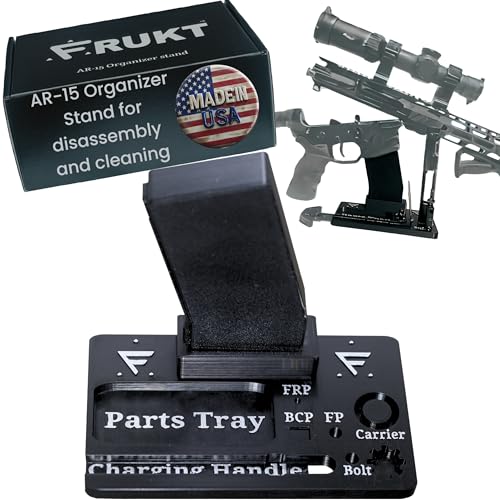
Step 1: Disassemble Your AR-15
Before starting the cleaning process, ensure you have all the necessary tools at hand. These include compressed air, solvent or degreaser, a rag, and any specialized parts you may need for disassembly. The exact disassembly process depends on your specific AR-15 model, but the following steps are generally applicable:
1. Turn off your AR-15 and eject any remaining ammunition in the magazine.
2. Flip the safety switch to the on position.
3. Use the appropriate tool (usually a wrench) to remove the bolt carrier group. This might also involve removing certain screws or adjusting levers.
4. Separate the upper and lower halves of the lower receiver body. You may need to remove the barrel nut or screws in the process. Again, these steps can vary by model; refer to your AR-15's manual for specific instructions.
5. Your AR-15 should now be mostly disassembled, although some parts may still need to be addressed, such as cleaning extractors and ejectors.
Step 2: Remove Metal Parts from the Gun
To clean the metal pieces more thoroughly, disassemble them further. This might involve removing screws, pins, and other fasteners. For example, you might need to access the lower parts of the trigger mechanism, bolt, and the barrel. The key is to ensure that any loose debris or contamination is removed from these areas.
💡 Pro Tip: Keeping a checklist can help you avoid forgetting any critical parts, ensuring a thorough clean.
Step 3: Brush the Interior of the Gun
It is crucial to clean the interior of your AR-15, as this is where a lot of debris and buildup accumulate. Using a solvent or degreaser, apply it thoroughly and allow it to sit for the recommended time. Typically, you should allow at least a few minutes for the solvent to break down the grime and allow you to get into all the inaccessible areas.
Use a soft-bristled brush or a soft cloth with the solvent to gently work the cleaning solution into the crevices. Pay special attention to the chamber, receiver, and slide. Remember to clean the bolt's chamber and sear as well.
Step 4: Dry and Put Back Together
After cleaning, drying the interior parts is essential before moving on to the exterior. Allow the gun to dry completely before proceeding. Once dry, reassemble the parts, starting with the smallest pieces and working your way up to major components. Ensure all parts are tightened securely as you assemble your AR-15.
Avoid using excessive force when tightening parts, as this could cause damage. Once the AR-15 is back together, go through the disassembly and cleaning process again as a final touch to ensure no parts missed out.
FAQ
Q: How often should I clean my AR-15?
A: Aim for at least once every six months, depending on your usage, to prevent corrosion and ensure your AR-15 performs at its best.
Q: What tools do I need?
A: In addition to compression air, you need a rust remover, degreaser, soft-bristled brushes, rags, a cleaning kit designed for your AR-15, and any specific tools for disassembly (e.g., screwdrivers, wrenches).
Q: Can I clean while the gun is still on my bike?
A: No, you should only allow compressed air to blow debris around when the gun is off your bike. Letting the gun stay on there while cleaning could lead to a dangerous situation, such as a bolt or slide getting stuck and releasing pressure.
Q: Can I clean while wearing gloves?
A: Yes, gloves protect your hands from the harsh chemicals in the cleaning solution and any dust or debris you may encounter during the process. Keep in mind, though, that gloved hands might need to dry first before handling any moving parts.
Q: Should I clean more often if I live in a humid climate?
A: If you live in a humid climate, consider cleaning more frequently—perhaps three to four times a year—to counteract the effects of moisture on your AR-15.
Q: Can I use a shop vac to remove dried debris?
A: No, a shop vac might introduce additional debris or damage delicate parts, such as the recoil spring. For larger debris, use a vacuum cleaner with a long wand to move parts out of the guns, then clean up the remaining debris by hand.
Conclusion
Regular cleaning of your AR-15 is an essential part of maintaining its reliability and safety. Following the steps outlined in this guide ensures your weapon remains in top condition. Remember to use proper tools and techniques, and to clean thoroughly, especially paying attention to the interior parts. For best results, aim for a regular cleaning schedule, and never compromise on safety or effectiveness. Good luck!
Happy cleaning, and continue to improve your personal development, firearms lifestyle, and self-improvement journey!